Posts

The Lyrans are coming!

Image
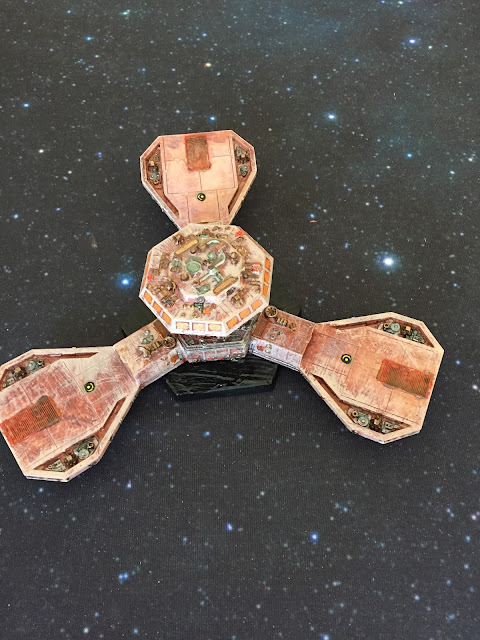
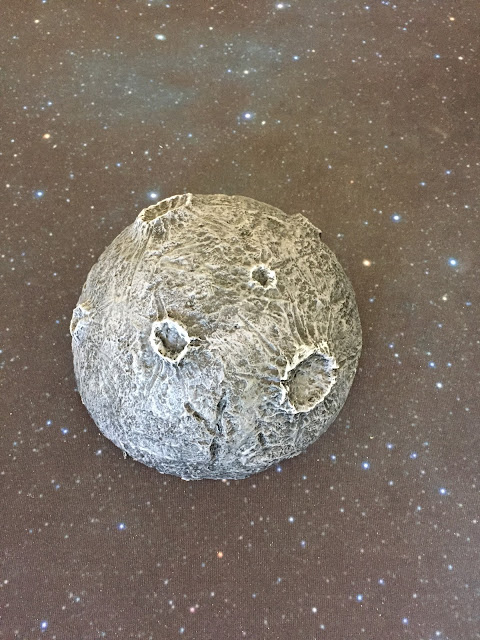
 Well, not quite - this is my attempt at a Battle Station. It would actually do for pretty much any of the major powers, but I gave it a base sandy color and stuck some Lyran Homeworld Clan markings on it: The Lyran decals have come out much more sharply than the Kzinti ones did, possibly because of the lighter background tones. And for some reason my stations always look manky rather than Star Trek pristine, but I like the well used look. The second photo shows more of the detail, of which there is a great deal indeed. The model is six inches across by two inches high. It came with a flight stand, but being made of resin the station was far too heavy to balance safely so I simply glued it straight onto its base. In any case its relative height means it will still fit nicely with my spaceship models. I'm getting quite a lot of painting done at the moment. Teaching has finished for this academic year, although admin and my own writing will keep me busy. Doing a colour every so often

Fly me to the moon

Image
 And other places. These are resin pieces, 6" diameter, sold by Combat Zone Scenery in the UK, and very nice they are too. Part of their Armada scenery range, they are useful hemispherical planets of various kinds. Here's my attempt at the moon/planetoid/large asteroid one: In any tabletop space combat game the miniatures are going to be wildly out of scale when compared with model planets, but often we need something visual to do the job well. These fit the bill nicely. Jungle planet: I used gloss acrylics for the sea effect. You'll notice a couple of metallic building son the surface - the moon of Endor? In fact, the other two definitely show the Star Wars Armada theme:  Ice planet - aka Hoth. And yes, that is a representation of a dead Tonton at middle right. You can also see a destroyed At-At walker at the top of the photo. The details are fun, but they have to impressionistic. I think this one turned out well, to my surprise. Someone once told me a long time ago not

Defending our Starbase

 The Nagato  has not seen direct combat action for a while now, but I know that our time will come. It does so in the form of an order to accompany another of our New Light Cruiser class as pickets for a Heavy Scout Carrier/Cruiser, one of our former Galactic Survey vessels that has been repurposed for the war. Our first engagement against the Klingon offensive sees us stationed at the far port end of of the fleet. In conjunction with a New Heavy Carrier with F-111 heavy fighters, we see off a Klingon attrition group composed of 24 fighters and six gunboats. We exchange fighters before the Klingons warp out, saving their gunboats. Our second fight is rather more dangerous for us as our flotilla is paired with a New Light Cruiser squadron to take on the enemy command element. Their ships are extremely dangerous, comprising a Heavy Dreadnought, a D5X Advanced Technology Cruiser and a D5L Command Cruiser. We manage to damage their front shields, but at the cost of severe damage to the NCL

Starbase Assault Phase Two

 I end up fighting in only one engagement accompanying the Victory , in which our group sees off three Federation cruisers, all heavily damaged. At this point I receive new orders: to report to the D7C Demonslayer  with the rank of Commodore. I will be in charge of a Battlecruiser flotilla for the next series of combats, although I am beginning to wonder how many that will in fact be: the attrition on both sets of forces is incredible. Now I am not in command of my own ship, but two D5W Heavy War Cruisers as well. We are assigned to mask the base while the remainder of the fleet engages the Federation ships. I deploy my formation with the two D5Ws in front of the Demonslayer  due to their superior shielding. We advance to just outside overload range of the station and perform the dance of death, a manoeuvre in which our ships do not move closer but instead use tactical moves to change shield facings. This inevitably gradually reduces the shields on our ships and I order the first of th

Starbase Assault Phase One

Image
 I take my place with the Rabblekiller  as one of two D5 Leaders assigned to accompany the B10 Battleship Invincible  in our attempt to reduce an Advanced Technology Federation Starbase. The approach battle was simple enough, but this fixed position will be difficult to tackle. I am not sure that we have the logistical superiority needed for such a task; against an "ordinary" Starbase, perhaps, but this one is a good 50% more powerful than that. A useful comparison view; from Deviantart Our first engagement goes well. The Flathead admiral is clearly one of their pre-war bureaucrats and we inflict a great deal more damage on their vessels than they manage to do to ours. We are in it for the long haul though, and our Admiral Ogir gives the signal for withdrawal as our fleet reaches the point where a viable assault on the base itself is no longer possible.  The second fight goes even better, although again we have to retire before engaging the base. Ogir's stated intention i

An epic campaign

Image
 It seems a long time since I began as First Officer of a Frigate. Now Captain of the D5L Command Cruiser Rabblekiller , I am tasked along with another D5L to front the Battleship Invincible  - in other words, to take any hits for her. The Eastern Fleet has been massively reinforced with a "swarm" of attrition units - 200 extra fighters plus another 18 gunboats, in addition to the already formidable force itself. In addition, a new wave of technology has seen the development of so-called "X-ships", advanced technology vessels with superior capabilities. We expect the Federation to deploy similar ships as we move to assault their main Starbase on the Eastern Fleet's sector.  Fighting has been going backwards and forwards in this region for years now and the wear and tear on the planets and Battle Stations is testament to the increasing severity of the war. Further to rimward, we have been able to maintain lines of communications with our Romulan allies. There are

Death of the Baron

 The war against the Lyrans and the Klingons continues to be a cat and mouse game, with the front lines flowing backwards and forwards. In effect, it is stalemate, although the casualty lists continue to mount. So does the loss of heavy ships as the Lyrans destroy the Dreadnought Hegemony  and kill the Baron. His heir is ordered to replace him on our front by the Patriarch, and he turns out to be very able indeed, destroying a Battlecruiser and a Mauler Cruiser in revenge. There is no end in sight to the fighting and we know that our economy is about to crash as a result of over a decade of pressure. Fortunately, so will that of our enemies - and we have the economic force of the Federation helping us.