First Klingon battle, Spring Y169
Six Klingon forces have descended upon various battle stations and planets all along the border with the Kzinti - apart, that is, from the easternmost one, which is a bit too close to the Federation for comfort. The Klingons don't want to fight the flatheads (yet), so there is no point in giving them an excuse to help the Kzinti. Several of these attacks are really just meant to pin some of the Kzinti in place, and this first battle is one of those. The Klingons don't have enough assets to force the issue at the westernmost battle station, although of course they will seize an opportunity should it come their way. Force compositions:

The main Klingon fleet is strong enough to give the Kzinti a headache, if not to threaten the station itself. The Klingons are led by a D7C Command Cruiser. They have a D6M Mauler Cruiser; a D6D Scout/Drone Cruiser; a D5C War Cruiser Leader; 5xD5 War Cruisers; and an F5 Frigate Squadron. The defending Kzinti fleet is led by a Battle Tug. As well as the station and its 12 fighters, they have a CVL Light Carrier Group with another 9 fighters; a CVE Escort Carrier Group with 6 fighters; a Command Cruiser; a Battlecruiser; an FFK refitted Frigate Leader; a Frigate; and a Scout Frigate. As usual, the attackers are superior in ships, while the defenders have compensated with fighters and the fixed installation. The combat totals are close, as are the fleet morale breakpoints, with the Kzinti just edging it a little. The Klingons are probably only going to make a single pass and then bug out; the idea is to keep these Kzinti ships occupied here while more substantial Klingon fleets make inroads elsewhere along the front.

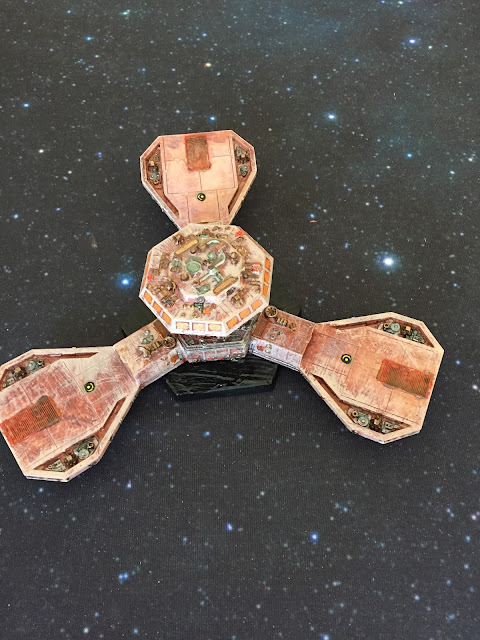
Light in the winter evenings here in the UK is not very good for photograph purposes, but the long table shot above, taken from behind the Kzinti, is surprisingly useable. The very centre of the area is occupied by the Battle Station, with its fighters deployed just behind it. Off to their back left is the Command Cruiser paired with the Battle Cruiser. The rest of the Kzinti are concentrated to the right rear of the Station - bottom right hand corner of the picture as you look at it.
The Klingons have deployed their F5 Squadron at the extreme right of their force (top left of the picture). Next in is a group of three D5 War Cruisers, then a D5 squadron with a D5 Commander; then comes the main cruiser force - D7C, D6M and D6D. Their deployment is reasonably balanced as a result.
Just by way of explanation, I have rules for how to deploy the fleets, using dice. Basically, each of these giant hexes is worth 5 SFB hexes, and the slower the ships, the further in they begin the game. The area is 11 hexes across, so I roll 2D6 to see where a given group begins, with fixed installations always in the same spot. I hope you can see from the relative deployments here that the Kzinti have a weak left, but an immensely strong right wing. To some extent, I do not have much idea how a particular battle will play out, and this is the first time in the campaign that the Klingons have taken the field. This makes it more interesting for me as a solo gamer.
The rest of the photos were rubbish as usual, but I hope the deployments and the following narrative will make sense. The lightest Kzinti ships are very fast, so the FF, SF and CL move ahead of the rest of the fleet. This puts them rather too close for comfort to the D5 squadron - Klingon War Cruisers are also very fast. First blood goes to the Klingons as the War Cruisers blow apart the Kzinti Frigate.
The other three War Cruisers mix it up with the fighters from the Battle Station, degrading them quite nicely; the Kzinti lose three fighters quite quickly here, for little return. Those D5-class ships have good anti-drone defences, and the Kzinti squadron leader elects to stay outside point-blank range to preserve his craft for as long as possible. However, one of the D5s loses its right rear shield to the Kzinti cruisers and also its front right shield to the power of the Battle Station.
The main Klingon cruiser force is engaged by the rest of the Kzinti fleet, and the Mauler loses its two front shields in quick succession. Given the number of ships and fighters here, it is becoming apparent that these Mauler Cruisers can take vast amounts of damage - all that battery power! Still, at least this means the damn thing isn't getting close enough to the station to let rip. Being Klingons, though, both damaged ships stay around for more punishment; individual Klingon ship morale is high because of all those Security Stations. Basically, anyone else would have left in a hurry. Not Klingons.
The rest of the engagement is a story of Kzinti success. Their Battlecruiser cripples the already damaged D5, while the main Kzinti carrier forces finally cripple the D6M. The Battle Tug cripples the D6D with a drone strike, mainly because it has been doing its job by helping the D7C and D6M by breaking drone waves' lock-ons. To add insult to injury, one of the F5 Frigates is crippled by a combination of firepower from the Battle Station and the Kzinti Command Cruiser.
So it's round one of six to the Kzinti. Playing a Klingon fleet, even one that is not the strongest possible, feels very different from the Lyrans because instead of ESGs, as a Klingon admiral you have anti-drones and your own drones. The result is probably roughly the same in terms of defending against Kzinti missiles. Lyran ships are probably more powerful than the Klingons in terms of phaser power, but then the one thing even refitted Lyrans always need is more power. The D5s in particular make excellent disruptor platforms, with wide fields of fire.
Overall, this took less than two hours to play. Only the Kzinti actually lost a ship, and even that was only one of their tiny frigates, affectionately known as "suicide boats"; the Kzinti don't even bother giving them names! The Kzinti also lost six fighters, with the FFK so badly damaged it wouldn't be able to stay for another fight, but this is irrelevant, since the Klingons head back over the border, their mission here accomplished. The attackers took a huge amount of damage and came out with several ships crippled, but none actually destroyed. That D6M Mauler Cruiser can sure soak it up...

Comments
Post a Comment