The Alliance Turn Begins: Spring Y170
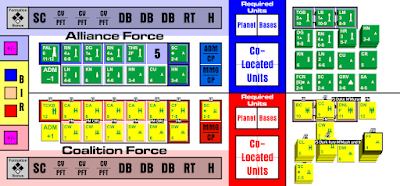
The Kzinti regroup and reform. I know that standard practice in F&E is to counterattack with the Alliance forces to take advantage of all those fighter factors, but in this hybrid with Star Fleet Battles this is not necessarily a good idea because the strategic-level game does not quite translate in that way to the tactical level. There is, though, a difference between the two alliance powers in that the Hydrans have even more fighters than the Kzinti; they are easily the nastiest in known space; and the Lyrans and Klingons are not yet in all-offensive mode on that front. So the Hydrans go for the second main Battle Station on the Lyran border:
I never know what to expect in these battles, especially when the Hydrans are involved - there are simply too many variables. As you can see from the Battle Mat, I constructed the Hydrans based on a hybrid force for the approach battle to the station, while the Lyrans are just based on pure combat power. The Lyrans are offering an approach battle because they want to stop the Hydrans getting a decent pop at the base for as long as they possibly can.
The forces are basically everything that is available to both sides on this front. The Hydrans have amalgamated everything into the Second Fleet, while the Lyrans have bolstered the Enemy's Blood and Far Stars vessels with the Foremost Duchy (basically, last turn's builds coming in as a reserve fleet).
I am really pleased with the way the card activation works; this is another great fight. The Lyrans are quite cagey, trying the Klingon tactic of staying at medium disruptor range and picking off fighters, but it doesn't work - there are just too many of them. In addition, the lightest Hydran ships charge ahead of the fighters. The War Destroyer Squadron hammers the Hydran Frigate Flotilla as it comes in, with all three crippled; they don't even make it. However, this leaves the Lyran ships open to the next wave which comes in the form of an unfeasibly large number of Stinger fighters; they don't bother to use half of their offensive power as they completely destroy the DW Squadron Leader and one of his compatriots, and heavily damage the third.
The Hydran Destroyer Squadron does something even more insane and charges the Battle Tug head on. All three of them are crippled before they get there, but this leaves the Tug sitting with no power left, and those are hungry beasts.
In another part of the action, the Hydran command element charges the Lyran War Cruiser Squadron. Both the Thoroughbred Fast Cruiser and the Paladin Dreadnought lose their front shields and take some internals as they come in fast, but it isn't enough to stop them. The Fast Cruiser heavily damages one Lyran War Cruiser, while the Dreadnought cripples another.
At this point the fleets leave the scene; with capital ships sitting in very vulnerable locations on both sides, the sensible thing to do is warp out and reconvene at the Battle Station itself.
Overall, the Hydrans only lost seven Stingers, and those are replaced by the fighters left behind by the crippled Lancer Destroyers as the fleet reorganises for an assault on the station:
Gaps are already starting to appear in the Order of Battle for both sides. The Hydrans, though, are capable of pulling this off; if they can, it will put a severe dent in the Coalition's supporting logistics. Any time the Alliance can buy at this stage will allow them to update their capital defences - and the Hydrans have another cunning plan up their appendages.
This one turns out to be just as vicious - these are great games. The Lyrans mostly set up to the left rear of their station, with the Battle Tug and its attendant Scout off to the station's right. The plan here is for those two to stick close to the Station's big guns while the cruisers and other ships destroy fighters. The Hydrans set up in a sort of mirror image: their Paladin and Thoroughbred Fast Cruiser are out on their right, facing all those cruisers, while the rest of the fleet is offset to the left.
As expected, the Lyrans destroy the Paladin's fighters quite easily, while the Hydran Frigates annihilate the station's fighter squadron. At this point, the Battle Station opens up at medium range and forces a Hunter Frigate to leave with Heavy damage.
The Hydran Destroyers make a mad rush towards the Lyran cruisers, and all three Hydran ships are effortlessly crippled. However, now that this main element of the Lyran fleet has shot its bolt, so to speak, the Hydran command element closes in on them and blows the War Cruiser Leader.
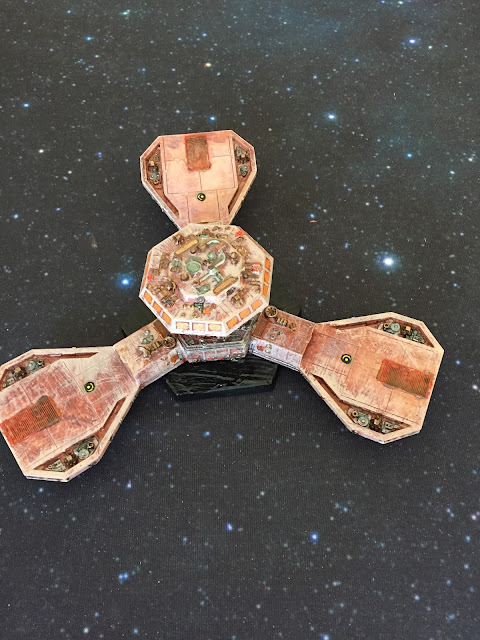
At the same time, at the other end of the Hydran line, the Rangers spot an utterly insane opportunity. Charging in close to the station now that it has mostly used its offensive power, they open up on the Battle Cruiser, ably supported by their Dragoon Hellbore ship. The Tug shrugs them off in impressive style, but this leaves it with nothing except ESGs.
The rather large Stinger Squadron from the Hydran Heavy Cruisers now moves in on the Battle Tug. Many fighters are destroyed by five ESGs (four from the Tug and one from the Scout Destroyer), but it is not enough to save the Tug. Just about the right number of Stinger-IIs get through and let loose, with overwatch firepower supplied by the four Hell bore fighters. There is an almighty BANG! as the Tug goes up. The Hydran fleet warps out to get ready for the next round.
Battle Station, Round 2:
The Hydrans lost seventeen fighters in the previous engagement, but it does look as though their strategy may well work. The whole idea has been to force the Lyrans to defend at a fixed point so that the Hydrans can use their advantage in attrition units in a counterattack that should help keep the Lyrans off balance strategically, and the same is happening on the Klingon Front. Even if the Hydrans don't blow the base, they are hoping to do enough damage to the Lyrans that their preparations for a major offensive are disrupted. This will buy the Alliance much-needed time.
It is rather fortunate for the Lyrans that the Hydran admiral is below par - probably a political appointee. It is also fortunate that the Enemy's Blood Duke has survived the demise of his favourite Battle Tug. He wants to keep control of events as much as he can since this is, after all, his Duchy that is being attacked, so he transfers his flag to his secondary command ship, a Battlecruiser. In the meantime, the Hydrans just keep coming. It is probably the disparity in command capabilities that is giving the Lyrans a fighting chance.
Having said that, the Lyran Duke doesn't behave like it. His deployment this time has all six of the light ships to the right of the station, and all the heavies to the left - with his command element at the outside left of the line. The Hydrans have their cruisers and frigates to their left, which gives them superiority here; the Destroyer and two Crusaders are opposite the enemy cruisers; and the Hydran command group is directly opposed to the Lyran Duke in his Battlecruiser. Here's how it goes:
1: The Lyran cruisers and Battle Station combine their fire, crippling the Knight Destroyer and the two Crusader Frigate Leaders.
2: The Hydran Frigates attack and destroy the Light Cruiser leading two Destroyers, but pay the price - the Cuirassier is blown, a Hunter crippled and the other heavily damaged.
3: However, the large Stinger group from the three Hydran Heavy Cruisers then moves in and vaporises both Destroyers.
4: The command groups clash in grand style, mainly because the Lyran Duke charges the Hydrans. His ship comes out the other end, crippled, but he is killed in action.
5: The Hydrans leave. They have lost nineteen fighters this time around.
In this one, the Hydrans came close to being able to attack the station directly. The sacrifice of the two Destroyers stopped the Stingers getting up close and personal with the installation, and the Hydran Heavy Cruisers made it into standard overload range before their fleet reached its breakpoint - all those light ships hammered. Fortunately for the Lyrans, normal overload range is still a bit too far for the Rangers to open up with their fusions.
Battle Station, Round 3:
The death of the Enemy's Blood Duke means that one of the others has to replace him, and the obvious choice is the Foremost Duke in his Dreadnought:
I draw the replacement admiral chit for him, and he turns out to be as rubbish as his opponent. The actually makes sense, since the Foremost borders the Klingons, the erstwhile allies of the Lyrans - his lot probably hasn't seen combat since his father's days in the early misunderstandings with the Klingons. Out of practice.


Comments
Post a Comment