Meerclaw in the Capital Region
It is now Spring Y175 and there are some glimmerings of hope - or at least, no sense of impending disaster. The Federation has committed substantial forces, including a CVA group, to our mutual front against the Klingons, and it seems as though the Coalition has reached high tide point in their offensive. They are still dangerous, of course, and continue to occupy the majority of our pre-war territories, and the Lyrans decide to press the point by mounting another attack on our homeworld region. They are doing so without any aid from the Klingons this time, since the Boneheads are preoccupied with the combined forces of the Federation Fleet and our Marquis Fleet, but this is a typical instance of Lyran aggression. On their own they will not be able to conquer Kzintai, but they probably still have enough power to devastate the military infrastructure on several of our man planets before they are fully recovered - basically, this is an economic strike. Count R'rorash is placed in charge of the fleet, being the highest ranking noble available.
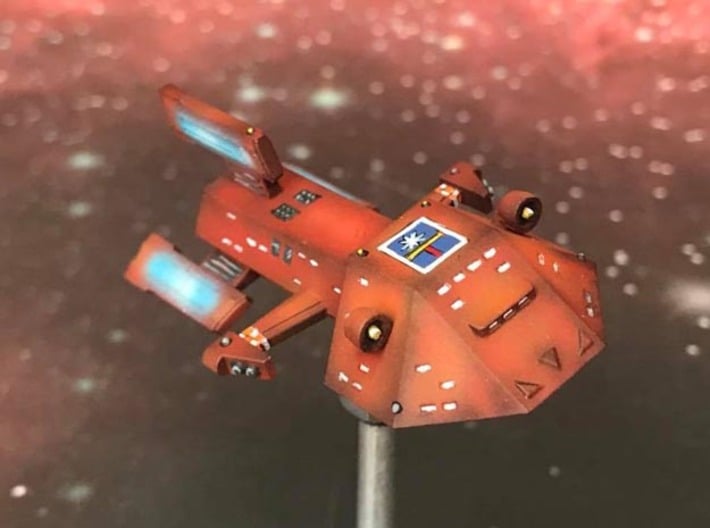
Newly promoted to First Officer of the CVL Tempest, I sit out the initial stages of this campaign as the enemy presses us backwards. Fighting is heavy, and casualties are severe on both sides. Our Battlecruisers take the brunt of it, and the Tempest is called forward to function in the role of Battlecruiser plus fighters at the planet of Zaforma.
We are positioned in the centre of the line near the planet itself, together with a Battlecruiser, the Count's early Dreadnought, and a Transport Tug carrying Scout pods. Off to our immediate port is a light flotilla, and then a cruiser squadron. This seems powerful, but we are directly facing the enemy command contingent: a Dreadnought and two War Cruisers, one of which is a Scout, supplemented with an Orion mercenary Heavy Cruiser. The Lyrans have also deployed a Carrier Group of their own in this sector, as well as a light flotilla; forces are probably evenly matched here. Our main strike force, a CVA group together with a Medium Cruiser Squadron, must be facing the rest of the Lyran fleet on the other side of the planet.
The Lyrans waste no time, with their command element closing directly on our own position. Their initial volley destroys four of our nine fighters - I know exactly how that feels from personal experience. I find myself entering combat stance, a state of body and mind that compartmentalises sympathy for our fellows, while at the same time allowing us the clarity to concentrate on our own particular role. In my case, this means manipulating the tactical displays, and I see our return volley flare against reinforcing shield energy. In the meantime, the lighter Lyran vessels summarily remove the remainder of our fighters.
At this point our Medium Cruiser squadron emerges to starboard from the shadow of the planet, distracting the Lyran command. Our Medium Command Cruiser is simply vaporized by the power of Lyran overloaded disruptors and heavy phasers, which they have in plenty. Our own group opens up on the heavy ships opposing us, shredding the front shields of the three cruiser-class vessels; their War Cruiser's front shield is entirely destroyed. At almost the same time the ships to our starboard cripple two enemy Frigates and remove the front shield of a War Destroyer. The Lyrans leave.
It turns out that the only ships they had to face our CVA group was a War Cruiser squadron and a light flotilla, so they were roughly handled, to say the least. The attrition worked well in our favor this time, but we shall see how long we can hold them at Zaforma.
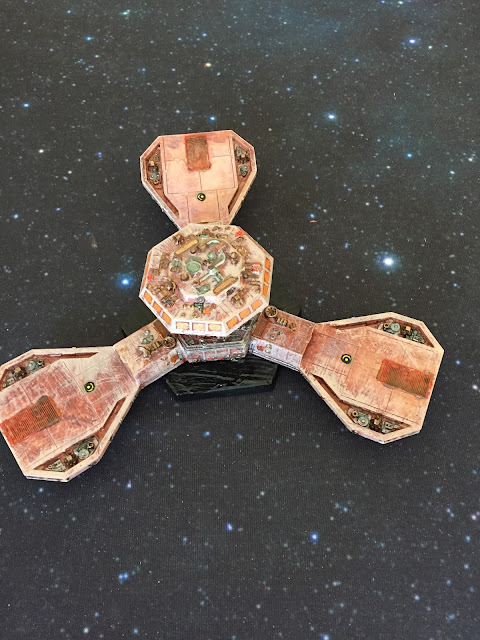
A Kzinti Medium Cruiser, according to Shapeways.
In they come again, and the Tempest is positioned exactly as before. However, this time the Count has mixed things up a little, and at our starboard is the CVA group, so deploying our main ships together. And as before, we are facing the enemy command element, comprising the same vessels as the previous occasion, supplemented with a frigate flotilla. The rest of the Lyran fleet is on the other side of the planet from us. This means that have the advantage in our sector, bu the Lyrans will have it in the other part of the battle.
And so it goes. As usual the Lyrans remove the Tempest's fighters, but our heavy presence here means we can put out an impressive number of drones, especially from the CVA's fighters. The Lyran frigates valiantly sacrifice themselves to stop the drones getting through to their Dreadnought and friends. The battle ends when we close to decent range and cripple the Orion mercenary Heavy Cruiser. Our fleet's only loss is yet another Command Cruiser - the third in this campaign, which means we have no more available in our theatre. It is possible that the Marquis's Fleet still has one, but this war is showing up the relative weaknesses of both sides. Our Command Cruiser design is less effective than that of the Lyrans, basically being a somewhat souped-up version of our Battlecruiser plus Flag Bridge facilities. The Lyrans have been carefully targeting our Battlecruisers, probably to stop the possibility of our upgrading them to carriers (as if we can afford that right now), and our cruisers are paying a steep price indeed. Still, we have quite a few Strike Carriers available; as well as being larger than the CVL-class to which the Tempest belongs, and so carrying more fighters, they also have Flag facilities.
The Lyrans make a rather halfhearted attempt in another round, but this time they only shred fighters in return for quite a few attrition ships of their own destroyed or crippled. They leave the region, presumably because they consider honor to have been satisfied or something.

Comments
Post a Comment